Good Evening Ladies,
It is a beautiful Sunday summer evening. All is quiet here.
I did a bit of running around with Sam today to get him ready to go off to school. I can't believe my baby is flying from the nest in a few days. He did get me set up with skype though. So I will still be able to see him. What a nice boy he is.
I have my entry for the new guest designer Sherry Cheever challenge over at
http://www.atjoansgardens.com/2011/08/guest-designer.html
http://sherrycheever.blogs.splitcoaststampers.com/2011/08/11/at-joans-garden/ This is the link to the challenge instructions.
Here is my entry.....
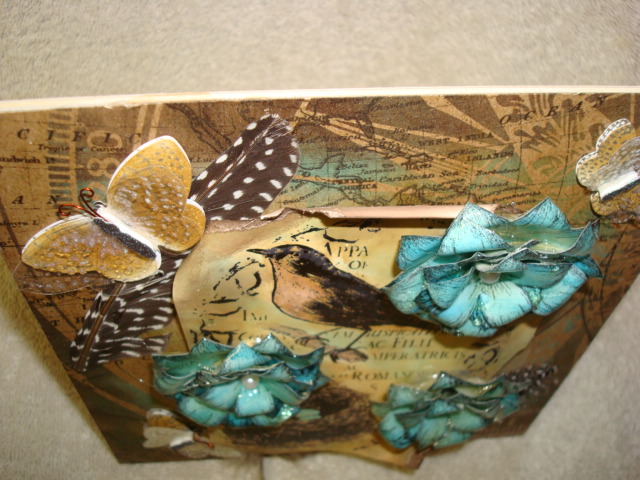
I decided to make my project in a shadow box. I started out with an unfinished shadow box. I needed to stain the wood. I used Tim Holtz distressed stain in the dauber top bottle. This made the frame easy to stain as I just ran the dauber top over the entire frame. This frame has a design to it. The low areas of the frame did not fill with the dauber top. To remedy this problem I took the Tim Holtz color wash spray. I took the top off it and dipped a paint brush in. I painted the color wash into the grooves in the frame. Below I took photos of the board out of the frame. I have found no way to keep the glare off of the glass. I wanted to show a better view without the frame.

I built this piece on the wood backing of the shadow box. For the background I used a Tim Holtz resist natural paper. I took three colors of Tim Holtz distressed ink pads and shaded them in with makeup sponges. When I got the color just right I went in with a paper towel and took the color off the resist. I used a La Blance stamp inked with black archival ink and stamped it onto the La Blanche specialty paper. I then colorized the image with the same three colors of ink as I used on the background. The smaller areas of the image were colorized using the Tim Holtz stumps. My flowers are made using a set of Heartfelt Creations stamps. I stamped them on bristol board, colorized them with Tim Holtz distressed stain in the dauber top. I cut them out by hand and curled the petals. The next step to creating the flowers was to warm up my melting pot with clear utee in it. Once the utee was melted I dipped each layer by itself, stacking them as I brought them out of the melting pot. I added the pearls after they were finished being stacked. As Sherry suggested I used a hot glue gun to adhere them to the stamped panel.

The panel was attached to the backboard with of all things a cut up piece of foam from an embossing folder package. I added the foam to the back of the panel and then to the backboard. This gave me the rise I wanted for the stamped image.
The butterflies are premade by K&Company. But they were stark white. I took distress ink and a makeup sponge to give them the correct color.
I tore and curled the image panel in a few places. Where I did this I used ink on the back so nothing would show white.
Feathers were added to the artwork to give it a natural feel. These were attached with beacon 3 in 1 glue. I love this melting pot technique.
Happy Scraps,
Mrs. Swandog


2 comments:
Oh my goodness Lori this is amazingly beautiful. I love how you used the new products you just purchased when you were in the shop the other day. Your flowers turned out gorgeous and I love the colors.
Great job and well done.
I am so glad you joined us at Joan's Gardens for the weekly challenge.
Joan
www.atjoansgardens.com
This is so pretty!
Post a Comment