Monday, May 30, 2011

Watering Can Thank You

Good Morning Ladies,
I hear this morning it is going to reach the 90's today. What the heck, yesterday it was 69 here. We had a big thunderstorm pass through yesterday afternoon. Lots of thunder and lightening. I lost power but only for a minute or two. I was thankful for that.
I spent more time creating yesterday and the guy didn't get home until 8. By the time they got home I was ready for some company.
For today's card I bring you Watering Can Thank You ......
 To create this card I used a heartfelt creations stamp set. I colorized the watering can and butterfly with Prisma color pencil and gamsol. To the butterfly I added black rhinestones from Kaiser. I stamped thank you directly on the paper with black memento ink. Behind the watering can is a fence die cut I cut with my new Cheery Lynn die. For the right side of this card I punched it using the martha stewert double loop punch.
This card came together easy.
I was over checking in at the scrap shack and think I may try the stair step card today. It looks like fun and not to awful hard. I will have to see what I come up with. You can check out the scrap shack here.....
http://scrapshack.ning.com/
Here is a side view of the card. I popped the butterfly.
Well ....off to create...
Happy Scraps,
Mrs. Swandog

Sunday, May 29, 2011

Holiday Weekend Sunday

Good Morning Ladies,

Well it's Sunday and I am still creating. My mom came over yesterday and I helped her with my nephews graduation album to set out at his party. She had things pretty organized so it went fast and I think we did nine 12 by 12 pages. That was fun!

I went to the mailbox yesterday and the blog candy I won from the Tim Times Ten challenge over at http://www.stampindymonz.com/2011/05/tim-times-ten-grand-give-way-challenge_07.html was in there. I won some really great stuff and can't wait to put it to use. Thanks Stampin Dymonz!

Today I made a birthday card for my dad.....


I pulled out my Tim Holtz paper pad and here is what I came up with. The airplane is a rubber stamped image from River City Rubber. I stamped it directly on the paper. Then I stamped another airplane on the same color paper and cut it out and popped it on top of the other image. The little black corners are what you get when you die cut the trellis and I found them very useful this morning. The gear is from the Tim Holtz metal gears and cogs. I thought this one would imitate the steering part of the plane. The Happy Birthday stamp is from an Inkadinkado wood mounted saying set.

I feel like my weekend is going great and I am getting a lot done....but the guys will be home this afternoon. So.....my time is growing short.
Happy Scraps,
Mrs. Swandog

Saturday, May 28, 2011

Trellis Die

Good Morning Ladies,
Yipee... a long holiday weekend. I kicked it off last night with my sister coming over to make graduation cards for all of accomplished graduates. We have them finished and ready to take to the parties we will be attending. Then we started playing with colors. I plan to keep it up this weekend and practice my craft as much as I can.

I will also be putting all my stuff back in my travel trailer to get ready for the premiere dog show coming up. Can't wait to get back on the road again. Just me, Windy, and the open road!

Here is a card I made using my new lattice die....

Well I guess I also used one of my new butterfly dies along with my new lattice die. These dies are by Cheery Lane. I purchased them at http://www.atjoansgardens.com/  The sunflowers are created using Heartfelt Creations stamps, that you can also get from Joan. The cardstock under the lattice is whitewash card stock that I sanded using the tim holtz sanding block. The sunflowers are layered and popped in between with pop dots to give dimension. I took a small tag and stamped my sentiment in tim holtz distressed ink in the color of wild honey. I also inked the edges of this tag.
I am loving these new dies and all of my new heartfelt creations stamp sets.

I broke down yesterday and bought a Zutter machine so I can bind handmade  books and what not. I will have to give it a try this weekend also.

Off to play...
Happy Scraps,
Mrs. Swandog

Thursday, May 26, 2011

New Dies

Good Morning Ladies,
Wow did we have the rain yesterday. But I am happy to say that my new gutters did the trick...all that rain and the basement is dry!

So I went to Joan's Gardens a week or so ago and bought some new dies by cherry lynn designs. I am diggin on these dies. They are so fun to work with.

Here is a card using one of the new dies....

This is a screen door die. It comes with two pieces of screen. But now I can see I will be headed down to the hardware store to get more screen. LOL I used white wash paper to cut the door out of. I gave it a light sanding. The dog is from inky antics. As well as the saying on the tag. I used a background stamp around the door, but as you can see I will have to take some time to perfect this technique. The screen door die also cuts a cat from the center to of the door. So no paper is wasted there. I'm telling you that you need to check out http://www.atjoansgardens.com/  She has the coolest stuff!

Happy Scraps,
Mrs. Swandog

Tuesday, May 24, 2011

elephant on parade

Good Morning Ladies,
We have had some really nice weather the past two days. I have been off playing and enjoying the weather.
School will be out soon and Sam will graduate from high school. These coming days are the last for me to wake him up for school. The time has passed so fast. My youngest son will be going off to college in August. I can't believe it.
Well I have created a card and here it is.....
This card was fun to make. The wood mounted image seemed to go perfect with the elephant cardstock base. The elephant is colorized with Prisma pencil and Gamsol. The happy birthday is stamped using the andirondak ink. A glitter paper mat shines on this card. The background paper is from Graphics 45 circus collection.
Graphics 45 is one of my favorite companies. I love the vintage look and the themes they create.
Well...off to wake Sam...
Happy Scraps,
Mrs. Swandog

Friday, May 20, 2011

Great Dane

Good Evening Ladies,
The start of a new weekend...how much will I get done? I have already been playing with my stamps...so it's off to a good start!
I went to Joan's Garden Wednesday night with my sister and a friend. We purchased a lot of cool new stuff. More dies by Cherry Lynn designs. I also picked up the new small rosette die by Tim Holtz. Can't wait to make some small rosettes. I bought two new colors in the spray stains. I'm loving those stains.
Here is a sample using more Heartfelt Creations flower stamps...
For this card I stamped the flower image onto bristol board. I colorized this with Prisma pencils and Gamsol. I added stickles to the vines. I stamped the Great Dane dog on bristol board and colorize him with the same supplies. I cut him out and attached him to the flower panel. I added a sticky diamond crystal. The background is punched using a Martha Stewart corner and boarder punch set. The edges are inked with Tim Holtz distressed ink in the color dusty concord. This was fun to create.
Bristol board is my favorite stamping base now. It takes gamsol very well. No problems blending here. I wasn't sure about the dusty concord the first time I tried it out but now I am finding out this is a nice shade of purple that works well with other hues.
I need to clean my closet out this weekend. Many clothes need to be donated.
Well...off to create...
Happy Scraps,
Mrs. Swandog

Thursday, May 19, 2011

Challenge #1: Scrapbook Layout, Tim Holtz Style...

Good Morning Ladies,
I got up this morning and it was raining again. I think this has to be the most rain I've seen in any spring! The grass sure does look pretty though.
There is another Tim challenge over at the Stampin' Dymonz Creative Space. You can see it here and vote for your favorite layout....


http://www.stampindymonz.com/2011/05/challenge-1-scrapbook-layout-tim-holtz.html 
Of course I am always up for a challenge. Here are the requirements....
Challenge Details
1. Create a 12 x 12 scrapbook layout -- single page.
2. Your background must be made by you -- not decorative paper. Use stamps/inks/chalks/markers to embellish plain cardstock to be used as your 12 x 12 background/base.
2. It must include one 4 x 6 or 5 x 7 picture. Only one picture.
3. It must include a tag, which has been created as the title for the page. The tag must be inked and distressed.
4. You must incorporate at least four TH-style embellishments - glass blocks, memory frames, sprockets, etc. (These do not have to be TH brand name embellishments.)
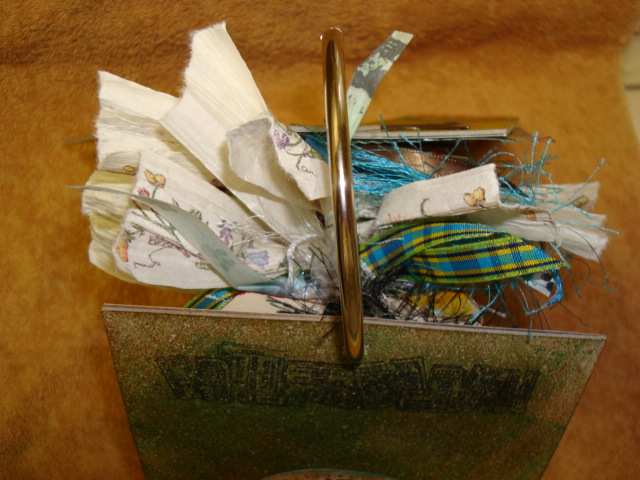
5. You must include some fiber on the page.
6. Your theme must be "Travel."

So here is my take on this challenge  .............................................................................................................
 This was quite a challenge. Believe it or not I have never created a background paper before. So I sat stumped for days. And then it dawned on me to use the techniques I used in the tag challenge. So I took a piece of light coco 12 x12 cardstock. First I used the tim holtz clock mask and sponged it with the tim holtz brushed corderoy distressed ink. I removed the masking and that looked pretty good. But I still had all this blank space. I remembered I had a stampendous block stamp with four textures on it. That was the ticket. I took the tim holtz vintage photo distressed ink and inked up that stamp. I stamped it randomly all over the page until it was all covered.
 My photos are a little out of order. I used a coin envelope for a little outside journaling and the rest fits on the inside. I inked this with walnut stain ink and added a tim holtz tiny clip to the top flap.
 This is a close-up of a little do dad I made using the melting pot, tiny cookie cutter and a magazine clipping.
 A close-up of my title tag. The stamps are from a tim holtz clear set. The letters are cut out of a tim holtz paper pad. I added a tim holtz pin and brown eyelash yarn for my fiber.
 This is a tim holtz bird from an embellishment package. I thought he looked cute sitting in the tree. I used tim holtz tissue tape on two corners of the photo to give it that vintage feel.
 This tim holtz wander charm fit in with my gypsy  travel theme.
Last but not least...I created tim holtz flower rosettes. Now these rosettes were created ahead of time out of ruler paper that was bright yellow. That would not do for this layout. So I took my new bottle of expresso color wash and gave it a try. The color was nice and all the yellow was now covered up, but I just had to add a little more something to these. So I grabbed my bottle of perfect pearl pearl spray and gave them a spritz. 
Thanks for the great challenge Dymonz. Keep pulling us out of our box and into a whole new way of life.
Happy Scraps,
Mrs. Swandog

Monday, May 16, 2011

More fun with Heartfelt Creations

Good Morning Ladies,
Yesterday proved to be rainy. The grass is green and growing just fine. Today is suppose to be sunshine. I can't wait to see the sun!
I helped my son create a steampunk mirror for a school project yesterday. I think it turned out really good for his first mixed media project. It goes to school today. I'm hoping the teacher gets what art is. This class that gave the assignment is creative writing, so we don't know what this teacher is going for.
I also stamped and created new cards. Here is a card I created....
I created this cute puppy card using a Heartfelt Creations stamp set and a inky antics dog clear set. I stamped the large flower on a white panel. I then created a mask for the flower and laid it down. I then stamped the feather ferns on and removed the mask. I stamped the yorkie dog on white and colorize him with Prisma color pencil and cut him out. I adhered him to the top of the flower. The flower is also colorized with Prisma color pencil and Gamsol. I must say the Heartfelt Creations stamps are fun and work with so many stamps in my vast collection of stamps.
My sister and I went to Jo Ann's yesterday. I picked up another different edge punch. This time it is a triple loop punch set. I saved too...it was 25% off. I can't wait to get a chance to use this set!
Well...off to get Sam up for school...
Happy Scraps,
Mrs. Swandog

Sunday, May 15, 2011

Too Much Fun Rubberstamps

Good Morning Ladies,
I think we have had plenty of rain now. And wow are the temps strange....90 one day and 50 the next. I will say rain keeps us inside and stamping!
Speaking of stamping....my mom sent me home with a couple of stamps she bought at a convention some time back...They are by the company Too Much Fun Rubberstamps. 
Here is a sample of the dog basket stamp....
 This is a wood mounted 2 sided rubber stamp. The basket is on one side and the puppy pull out is on the other side. Fun and easy to create. The basket is stamped with the bottom on a fold. When you cut it out it only need glue on the two sides to form the pocket to hold the puppy pull out.
 This is the puppy pull out pulled out part of the way.
This is the puppy pull out totally removed from the basket. I used Prisma color pencil and Gamsol to colorize this pull out card. Now the welcome puppy I added from a clear stamp set. You can stamp or hand write any message you want on the pull out.I added ribbon roses just for fun. Thanks mom I enjoyed making this one.
I do have a hooded sweatshirt sweatshirt stamp from this company that I will have to get out and work with.
Well....off to create...
Happy Scraps,
Mrs. Swandog

Saturday, May 14, 2011

Fun with Heartfelt Creations

Good Morning Ladies,
I am up and posting early today. Sleep did not come along so well last night. I have no reason why.
I have been stamping with the Heartfelt Creations stamps and die I bought at Joans Gardens. Here is her web address.... http://www.atjoansgardens.com/ She does mail order and only charges what it costs her to ship. If you want Heartfelt Creations she is your go to gal.
So here is a sample of what I have been creating.....
 I used the daffodils stamp set and the matching die-cut. The daffodils are colorized using Prisma pencils and Gamsol. I then cut them out using the matching die-cut set. I layered them as you can see in the side views below. The mat edge was created using the Martha Stewert double loop corner and edger punch set. The orange doily was cut using a Cherry Lynn doily die (you can also get this from Joan). I attached the doily with US Art Quest matte PPA. This is another product I dearly love and recommend.

Side view of the layers and the popping.
The doily dies are so delicate and pretty. They cut on any die cut machine. I used my cuttlebug. This company also makes a metal shim that can be used with any die cut or embossing folder for a shim. No more folding a piece of cardstock to add as a shim in your machine. This shim comes in two sizes.
With the weather turning cold this weekend I suppose I will play some more with my stamps, inks, and dies.
Happy Scraps,
Mrs. Swandog

Saturday, May 7, 2011

Tim Times Ten Grand Give-A-Way Challenge: Day Ten -- The End.

Good Evening Ladies,
I'm sad to say this is the last day of the tim times ten challenge over at...
http://www.stampindymonz.com/2011/05/tim-times-ten-grand-give-way-challenge_07.html#comments
Be sure to check it out if you have not yet. Really cool tags and techniques.
Today's challenge is our last challenge,  is to make a Brag Book of the nine tags that you have created over the last nine days. It can be bound by rings as I have done or by using a Cinch or BIA or other wire binding device. The tags must be in the Brag Book in the order in which they were created over the nine days. There must be a way in which you display/provide the recipe for each tag. You must have at least one cut from a die-cutting device -- Cricut, Cuttlebug, MS Punch, etc. -- whichever one you use doesn't matter. You must create a cover which utilizes a sentiment and an image stamp and the acrylic paint resist technique.
So here is my take on the last challenge....

 For my front cover I took Tim Holtz grunge board and split it in half. I then took the clock image from the Tim Holtz clear stamp set Life's Possibilities. This was my resist stamp. I covered it in sunset orange adirondack acrylic paint dabber. I stamped it on to the grunge board cover in two places. I then used the Tim Holtz distressed ink pads in the colors of walnut stain, crushed olive, spiced marmalade, and broken china on the entire cover. I wiped the ink away from the clocks with a paper towel spritzed with water from my mini mister. I then added my car stamped image and enjoy the journey saying from the Tim Holtz clear stamp set Playful Journey in black memento ink. I stamped The words "one of the advantages of being disorderly is that one is constantly making exciting new discoveries." from the Tim Holtz clear stamp set city central in black memento ink.   For my die cut I used a Tim Holtz on the edge die houses. This is cut out of Tim Holtz grunge paper and then inked with the Tim Holtz distressed ink spiced marmalade. I added a bird from the Tim Holtz embellishments collection. I attached this with the beacon 3 in 1 glue. I really liked the acetate tag we did so I added a piece of acetate that I ran through the cuttle bug with the Tim Holtz retro circles embossing folder. I used alcohol inks in the colors of stream, terra cotta, and butterscotch to add color to the acetate. I added this between the two pieces of grunge board to complete my cover. I punched holes in the two pieces of grunge board and the acetate to run my ring through. I made some bulky tags, so I had to use a giant ring. I punched a hole through my back cover to run the ring through. All the tags had a hole in the top so that made it easy to assemble.
 This is my back cover. I used a clock from the Tim Holtz cardstock stack. I inked the edges in broken china and added metal hands. The cover is inked with the same ink as the front. The stamping is the ticket row from the Tim Holtz clear stamp set Life's Possibilities.
This is the top view of the book.
 This is a side view of the book.
 I decided to do something a little bit different for my instructions. I used coin envelopes. I stamped the pen nibs from the Tim Holtz clear stamp set artful things in black memento ink. I then grunged them up with the Tim Holtz distressed ink pad walnut ink. I punched a hole at the top of each envelope and ran a chain from the Tim Holtz ball chain package. I wrote the technique and the tag theme on each envelope. I hung these behind each tag from the ring at the top. This makes it easy to take them off and take the instructions out of the inside.
A close up of the instruction envelopes.
Not pictured but on the inside of the front and back covers I used the Tim Holtz music paper.
This ten day Tim challenge was a blast. I learned new things....tried things I have never tried before...got to use alot of my Tim Holtz stash.....and am inspired by all the great artists that have been a part of this.
I saw in an earlier post that Stampin' Dymonz is going to be a challenge spot now. I am looking forward to the many challenges that are yet to come!
Happy Scraps,
Mrs. Swandog

Friday, May 6, 2011

Tim Times Ten Grand Give-A-Way Challenge: Day Nine

Good Evening Ladies,
I worked later than I thought I would be working. That's ok I need to make money so I can buy more Tim Holtz stuff. LOL
Jump on over and see the day nine tim challenge at....
http://www.stampindymonz.com/2011/05/tim-times-ten-grand-give-way-challenge_06.html
There are lots of cool tags and designers to checkout.
Today's challenge was....How high can you go? Today's challenge is to create a dimensional tag. At least two elements must lift up off the page. The edges of the tag should be inked. At least one dimensional flower and 3 buttons should be incorporated in the design.
Here is my take on this challenge....

 For my background I used radiant rain in red and sprayed gold glimmer mist over the red. I then took a button stamp and stamped the buttons in Tim Holtz distressed ink black soot.  I used Tim Holtz grunge paper to create my 3-D flowers. I used the radiant rain in red and sprayed the gold glimmer mist over that. I then stamped 3 flower layers using a Heartfelt Creations stamp set in memento black. I cut each layer by hand. The bottom layer I curled the petals with a round file tool. I put theses together with pop dots. I added buttons for the center of the flowers. I stamped a corset stamp on white cardstock and just added red with my Prisma pencil and Gamsol. I added black rhinestones for the hooks. I cut this image out and popped it up on the tag along with popping up the flowers. I inked the edge of the tag in black soot. I used beacon 3 in 1 glue to attach the 3 feathers. I took tan cardstock and stamped the words "The Queen of Night Shines Fair With All Her Virgin Stars About Her" in black soot. I also edged this piece with black soot. For the tie at the top I added black sparkley fiber.
 This is a view of the flowers popped up with many layers of pop material.
This is a view of the corset popped up with three layers of pop material.
This was a fun challenge...as was all the others before it!
Happy Scraps,
Mrs. Swandog

Thursday, May 5, 2011

Tim Times Ten Grand Give-A-Way Challenge: Day Eight

Good Morning Ladies,
It's day eight of the tim challenge.... check it out here..
http://www.stampindymonz.com/2011/05/tim-times-ten-grand-give-way-challenge_05.html
The requirements for today's challenge is to create a distressed tag. You must use a minimum of 3 colors of ink. You must use at least 1 image stamp and 1 sentiment stamp. You must color your sentiment stamp using two different ink colors and stamp -- this should be one press on the tag and not "stamp one color, clean stamp, stamp second color." A unique piece of ribbon or other embellishment should be used for the hole in the tag.
So here is my take on this challenge....
To create this tag I used five colors of the tim holtz distressed ink...wild honey, crushed olive, peeled paint, pine needle, and walnut stain. The background is created with all the above colors. I couldn't find my mat so I had a couple of disasters to start. Foil does not work well for this technique. A plastic bag did not work for me either. I used parchment paper that worked just fine. Once I got that worked out everything else went just fine. I was ready to stamp. I choose to use walnut stain and pine needle for the two inks on one stamp process. I used lie the life you've imagined off of the tim holtz clear set life's possibilites for this technique. Next I stamped the guy with the umbrella off of the same set. He is ink in walnut stain. I stamped him off the bottom and the side. I then grabbed the tim holtz clear set city central. From this set I stamped the eye in walnut and the words it's all persepctive in pine needle. I then stamped the small twisting leaves from stampscapes in pine needle around and off the edges of the tag. I inked walnut stain around the whole edge of the tag.I added a tim holtz thoughts token. For the hole in my tag I threaded art wire. I added beads to the wire and twisted them on. Another fun challenge.
This tag made me thoughtful of my life...I love the saying it's all in perspective...because that is so true. I need to remember that I can live the life I have imagined. Some days that seems to be so hard with all of life's craziness. I realized today that this group of amazing creative ladies has kept me grounded. Something I was in great need of. So thanks to all who are a part of this challenge.
Happy Scraps,
Mrs. Swandog

Wednesday, May 4, 2011

Tim Times Ten Grand Give-A-Way Challenge: Day Seven

Good Afternoon Ladies,
This is day 7 of the Tim x ten challenge. You can see today's entries here...
http://www.stampindymonz.com/2011/05/tim-times-ten-grand-give-way-challenge_04.html
Stampin' Dymonz challenges are awesome!
An acetate tag. The acetate must be dry embossed. It must be inked. Your tag must be two-layered, include an image, and you must use some type of "dimensional" product to embellish your image -- fun flock, flower soft, heat embossing, etc. Your tag should depict a cold scene -- could be winter or fall and does not have to include snowmen/snow, just ensure you make a good representation of colder weather. The acetate should be from some packaging that you may have at your craft spot in order that you recycle the plastic and help prevent us from killing our own planet with non-biodegradable materials such as plastic...
Today was a bit of a stumper...I have used acetate but not in this way before. So here is my shot at this challenge.

I think taking the photo was the most challenging. LOL  My favorite part of this challenge was the saving the earth aspect. The words cold scene caught my attention right away. I grabbed a tag and my stampscapes stamps. I stamped the tree trunks in memento black. I then colorized them with prisma color pencil and gamsol. Next for dimension I added snow tex. Whats more winter than snow. I applied my snow tex with a pallet knife. To speed things up I used my embossing to dry the snow tex. I then stamped a Dee Grunig husky dog on plain white cardstock in black memento ink. I popped this little guy up with three layers of pop dots.
I took my Tim Holtz sander packaging and cut the acetate from it and cut out my top tag layer. Off to the cuttlebug to emboss snowflakes on the acetate tag. I added tim holtz stream alcohol to the back of my embossed acetate tag top. This seemed a little strong in color, so I took the tim holtz blending solution and squirted it here and there on the alchohol ink. I kind of rolled it around and took a paper towel and dabbed it off where it was heavy. I adhered the acetate tag to the cardstock tag with beacon 3 in one glue, leaving just the bottom portion loose so as to show off the dimension. On to the top of the tag....I added the saying "To Have Vision One Must First Dream". This is stamped on white cardstock with anirondak sail boat blue ink. I used the light ink so the saying wouldn't overpower the look of the tag. For more dimension I added snow tex at the top of my tag and sprinkled some sparkle soft on top of it. What was more fitting than some silver sparkly fiber for the tag tie.
As you have noticed I love animals and the outdoors. This comes through in my work time and time again. These challenges have made it possible to stay true to myself and create with things I really love!
I am having so much fun and look forward to each morning when the new challenge is awaiting on the Stampin' Dymonz website.
Happy Scraps,
Mrs. Swandog

Tuesday, May 3, 2011

Tim Times Ten Grand Give-A-Way Challenge: Day Six

Good Afternoon Ladies,
Today is day six over at
http://www.stampindymonz.com/2011/05/tim-times-ten-grand-give-way-challenge_03.html  Stampin' Dymonz. Click on the link to see all the wonderful creations.
Today's challenge requires a gift card holder tag. The gift card pocket must have at least 2 of it's corners punched with a corner punch. You must show in your picture the "card" in the pocket. The tag must contain at least 3 handmade flowers , a sentiment, and the background of the tag must be inked . You may use Color Wash or other spray type ink, or pull out your stamp pads and sponges. The inking technique for the tag background is your choice; however, the background must be created using only ink.
Here is my take on this challenge....
I inked my tag with tim holtz distressed ink in sea glass and andirondak ink in sky blue. I sponged this on the entire tag. I took a piece of white cardstock and cut it to fit a gift card. I punched the corners with a Martha Stewart corner punch at the top. I inked the edges with the sky blue ink. I stamped a dog image from Inky Antics and colorized him with Prisma pencil and Gamsol. I stamped a pawprint at the top of the pocket. I attached the pocket with the thinnest miracle tape. This was an easy way to keep the right size open in the pocket for the gift card.  The flowers were created using outlines stamps. I stamped the flowers on coordenations glitter paper in two colors of blue. I then cut them out and curled the petal edges. I attached them to each other with square brads. My sentiment read Welcome Puppy. I tied ribbon on the top. The ribbon was white with black pawprints. I wanted it to match better so I ran the ribbon through the sea glass ink pad.
I enjoyed this challenge. I am always giving new puppy gifts to my friends. Just recently I was thinking about giving gift cards to the pet store as something new and different. This challenge could  not have come at a better time as of my friends will be getting her new puppy in a week. This will be a no brainer for me...I have it already made.
This ten day challenge has filled me with inspiration.
Happy Scraps,
Mrs. Swandog

Monday, May 2, 2011

Tim Times Ten Grand Give-A-Way Challenge: Day Five

Good Morning Ladies,
It is day 5 of the http://www.stampindymonz.com/2011_05_01_archive.html over at Stampin' Dymonz. Click on the link and check it out.
The day five challenge requirement is to create a Card Tag. It must be created with one sheet of cardstock, scored and folded.  On your card, you must have an image that you colored by hand. You don't have to use Copics if you do not own them; however, some type of craft markers are a requirement for this challenge. Your coloring should be use at least 2 different colors and you should shade your image to the best of your ability. You must mat your image with a mat that has been distressed by sanding.
Here is my version of this challenge....

 This is the front of my tag card. I cut the tag card out of black cardstock.I stamped the parrot image using memento black, I colorized him with 6 different colors of copic markers. I stamped the word wild using tim holtz distressed ink in vintage photo. I added a pair of metal wings from tim holtz odornment charms. I then inked the edge of the parrot panel with tim holtz distressed ink in broken china. I layered this panel to a panel of cordenations paper from the chocolate collection, that I distress with the tim holtz sanding block. I attached this to my tag card. The ties at the top are ribbon.
 Since I made my tag card out of black cardstock I added a white panel on the inside for a personal message. On the white panel I stamped birds on a wire stamp from the tim holtz clear stamp set Life's Possibilities.
I have not had my copics out for such a long time...so this was a challenge. My first two attempts went into the trash. I changed stamps and was much happier.
Can't wait for tomorrow's challenge!
Happy Scraps,
Mrs. Swandog

Sunday, May 1, 2011

Tim Times Ten Grand Give-A-Way Challenge: Day Four

Good Morning Ladies,
Here are the requirements for day four of the Tim Holtz tag challenge over at http://www.stampindymonz.com/2011/05/tim-times-ten-grand-give-way-challenge.html
A four panel accordion tag, spring/spring break, fun, sun, activities. One word cut out and inked. Decorate the front and that back of this accordion tag.
I have never been on spring break....so my tag is spring....A Walk In My Dad's Spring Gardens. My dad has flower gardens ....well let's just say flower gardens are my dad's whole yard. I like the idea of adding photos of my dad's flowers.

 This is the front of my tag. I used a K& Company paper for my tag base. It was paper so I cut two and a cardstock piece to make it sturdy. All three of these are glued together. I then took my tag bases and scored it on the score-pal and folded it. I creased extra heavy since I had three thickness to score through. I cut my words with alpha sizzix dies on adhesive backed cardstock. I inked the letters with andirondak lettuce die ink. The flowers are hand stamped and colorized with Prima color pencil and Gamso.. I hand cut the images out. These images are from Heartfelt Creations. I am in love with their stamps. My photo mats are textured paper from US Art Quest. The ties at the top are made from vintage paper ribbon.
 This is the backside of my tag. The big purple flower  is stamped, colorized with Prisma pencil and Gamsol. It has three layers and the petals are curled. I added a touch of stickles to this flower.The stamp company for this flower is heartfelt creations. The puppy is stamped, cut out and colorized with Prisma pencil and gamsol. The butterfly is a metal embellishment. The last flower is stamped on a shiny textured white paper that I colorized with alcohol inks from ranger. The stamp company is outlines.
 This is a close up of my letters. Boy were they hard to ink...they are tiny...
A close up of the butterfly...I had to add some metal...
This challenge was fun once I got started...LOL I was a little worried this morning. But what is a challenge if it's not challenging.
Happy Scraps,
Mrs. Swandog