Tuesday, September 27, 2011

Reindeer In The Forest Christmas Greeting Card

Good Afternoon Ladies,
When I got up this morning I had no internet. So I created instead. Not a bad thing. I have many pieces I must turn into cards. I need to find more time. LOL
Here is a card for you today....I call it Reindeer In The Forest Christmas Greeting Card
 This card was created using the masking technique. First I stamped the reindeer in dye ink. I then masked him with eclipse tape. (I love that stuff!) Then the tree scene was stamped. I used a grey prisma pencil and gamsol to create shadows in the snow. The trees were colorized with a green prisma pencil and gamsol. I added white stickles to the trees to create the snow. For the snow on the ground I used liquid pearls in white. This works like a charm and is easy to draw lines with. I used three layers of dsp. The middle layer is punched with a Martha Stewart punch set.
For the inside of the card I used this fun saying and embossed it in silver. Two layers of dsp finish the inside.
The outdoor woodsy feel is perfect for my friends who have field dogs. At any rate I feel this is a manly card.
Off to dog training..
Happy Scraps,
Mrs. Swandog

Monday, September 26, 2011

An Old Fashioned Christmas Poinsettia

Good Evening Ladies,
I guess you never know when I will post these days. Could be anytime of the day or night.
I received an order from scrapbuck today. Got some cool stamps and a new die set. Can't wait to play with those. Christmas seems to be in the creating air. You know we must get those card done now or we won't have them to send out by Christmas.  So I have been working on it.
Here is a new Christmas car for you. An Old Fashioned Christmas Poinsettia ...
 This card was created using the poinsettia set from Heartfelt Creations. This set can be purchased at http://www.atjoansgardens.com/   I stamped and embossed this stamp set in gold on maroon card stock. I hand cut the pieces out and curled the petals. I used Tim Holtz distressed stickles in straw. The vintage image is by Inkadinkado. I stamped these vintage girls on La Blanche paper that you can also get at Joans. This image is colorized with Tim Holtz distressed ink. A gold metallic pen was used to create the right hand corner. Above the window straw stickles was applied to create snow in a vintage sort of way. This panel sits on top of two layers of dsp. To finish this card off I added maroon lace to the top.
A view of the 3-D poinsettia flower.
If you are missing a color in the distressed ink pads and the store is out of the color you need....you can use a reinker in that color. Just pull the eyedropper portion out of the bottle and touch your pen nib to the shaft. It will pick up just enough color to use.
Happy Scraps,
Mrs. Swandog

Sunday, September 25, 2011

Challenge #3 at Joans Gardens Card With A Custom Box

Good Evening Ladies,
I have been at a dog show this weekend.  So here I am on Sunday night posting my card for the new challenge over at http://www.atjoansgardens.com/2011/09/this-weeks-challenge.html
This was a fun and interesting challenge. That once again made me think out of the box... This was the guidelines of the challenge....
■ Create a Card using Purple
■ Create a card using something Dimensional (flower, butterfly, etc)
■ Create a Birthday Card
■ Make a box for your card using Selma's Tutorial
Here is my take on this challenge....
 This is my card. The card base and lower white layer is glitter card stock. I then used my latest purchases at Joan's. I used the Mediterranean Lace Rectangle die from Cheery Lynn Designs and cut it out of silver metallic card stock. I used this as an overlay for a piece of bristol board I colorized with Tim Holtz distressed stain in dusty concord. The sentiment is stamped on a spellbinder die with dusty concord distressed ink. The flowers were created using the Cheery Lynn Designs dies, stacker flowers #6 and stacker flowers #4. I layered these dies using small white buttons in between and to raise the flowers up off of the card. The buttons offered a sturdy base and layers for these flowers. I sprayed the flowers with the goose bumps spray to stiffen them and give them shine. The little girl image is colorized with prisma pencils and gamsol. The centers for the flowers was created with the new liquid pearls. This is an image my sister had stamped off for me at an earlier date.
 This is a view of my raised items.
 Next was the box. This is a top view. The flowers are created the same as the card. The same die is used for the sentiment. The silver pieces on the top are the waste from the frame die on the card. A white bow accents the top of the box.
 This is a view of the raised flowers on the box top.
 This is the box open with the card inside.
 A view with the box half opened.
I took me a bit to get kick started on this challenge. Purple is my sister's favorite color, but I have struggled with purple for a long time. So this was really out of the box for me. I also presumed that the box was going to be a problem to create. I was so wrong about that! Selma's instructions were excellent and this box was easy peasy to create.
Thanks Selma and Joan for helping me reach new heights!
Happy Scraps,
Mrs. Swandog 

Friday, September 23, 2011

Poinsettia Christmas Card With A Flourish

Good Morning Ladies,
I am posting early today. I had quite a bit of a sleepless night last night. So here I am.
Here is my card for today....
I am loving the poinsettia set I bought at http://www.atjoansgardens.com/      You should really check out her site. I gold embossed the flowers and used Tim Holtz distressed stickles in straw for the centers. The background is created using bristol board , tim holtz distressed ink in vintage photo, gold embossing powder, and a holly swirl stamp set from Heartfelt Creations. The sentiment is stamped and embossed using gold embossing powder. The die is cut from a spellbinder die. The merry christmas is from viva las vegas stamps. This piece is sponged with distressed ink. My card base is 6 1/2 inches by 6 1/2 inches and is made from DCWV script heavy cardstock. The flourish is cut from a cheery lynn designs die.
Side view of the popped 3-D flowers.
Well...off to create...
Happy Scraps,
Mrs. Swandog

Thursday, September 22, 2011

Penny Black and Heartfelt Creations Bird Christmas Card

Good Morning Ladies,
I got home to late last night to post anything. So here I am this morning.
Here is a card I created using the penny black holly bird stamp and the heartfelt creations poinsettia set.....
 To create this card I took a piece of La Blanche paper and stamped the bird and holly. The bird and holly stamp is by Penny Black. I used a La Blanche stamp to create the background. I colorized the scene with Tim Holtz distressed ink. I die-cut a Cherry Lynn Designs flourish out of Kaiser paper and added that to the corner. I stamped the poinsettia set by heartfelt creations on heavy maroon cardstock and gold embossed the layers. I put these flowers together with pop dots for a 3-D effect. The items I used to create this card can be purchased at http://www.atjoansgardens.com/
 Close-up of die-cut and poinsettia flower.
This is a side view to show the 3-D effect.
This card was fun to create. I love all the newest cutting edge products I get at Joan's. She seems to have all the cool stuff first.
Well....off to do laundry..and create..
Happy Scraps,
Mrs. Swandog

Tuesday, September 20, 2011

Merry Christmas Card Snow Scene Heartfelt Creations

Good Afternoon Ladies,
I am usually on the fly at this time on a Tuesday. But I have no training tonight. So what else would I be doing but blogging. Right?
Now the card I am showing you today was my first attempt at the challenge over at Joan's Garden. http://www.atjoansgardens.com/2011/09/card-challenge-2.html click there for the details on this challenge.
I finished my card and saw that I was suppose to use gold embossing and I used silver. So I started all over with a total different card. Anyway here is the first card.....
For this card my main focal point is the snow scene that I stamped on bristol board with a Heartfelt Creations stamp. The picture doesn't show it well at all. I used Prisma pencil and gamsol to colorize the image. I then added in white glaze pen and crystal laquer to give the snow a snow like look. I edged the spellbinder die-cut with Tim Holtz maghogany distressed ink. The Merry Christmas is silver embossed. The die is edged with the same ink. I took a sizzix embossing folder and ran bristol board through my cuttlebug using wild hair as my ink.The background papers are from the Christmas Lost and Found collection by My Mind's Eye. Black braid trim sits under the Merry Christmas piece. My star is an old pierced earring that I snipped the post off of. I wish I had used gold embossing powder, but it made me push even further for the challenge.
Well my muse is tapping me on the shoulder...so I'm off to create..
Happy Scraps,
Mrs. Swandog

Monday, September 19, 2011

Card Challenge #2 Joan's Gardens

Good Evening Ladies,
Time flew away from me this weekend. But it is Monday and I am back to the week.
I am participating in Joan's Challenge this week. The requirements are
■  Create a Christmas Card
■  Create an embossed background using Selma's Technique

■  Used Striped designer paper
■  Gold emboss your sentiment
You can check out all the details here  http://www.atjoansgardens.com/2011/09/card-challenge-2.html 

Here is my take on the challenge...
 I went in an unconventional way. I don't know what the true name of this La Blance stamp is but he reminds me of Ebnezer Scrooge from The Christmas Carol. With the numbers in the background...well it just gives me that feeling. I stamped him  on La Blanche paper that I cut with a spellbinder die. I colorized him using the Ranger pen nibs with Tim Holtz distressed ink. The background of this was colorized using a make-up sponge and distressed ink in vintage photo. I ran the next layer through the cuttle bug using a sizzix snowflake embossing inked with distressed ink. My stripped paper and the main base paper is from the lost and found christmas pad from my mind's eye. The holly berries and leaves are from a heartfelt creations stamp set. They were stamped onto the La Blanche paper and colorized with the distressed ink. I hand cut them out and used pop dots to attach them. All the supplies above were purchased at Joan's Gardens. I didn't have a Bah humbug stamp so I had to improvise. I took a companion die and cut a smaller version for my sentiment. I used a Ranger bullet point perfect medium pen and wrote the sentiment. I then sprinkled with Ranger gold embossing powder and used my heat gun to raise it. Two colors of distressed ink were applied over the top of the die. I used distressed ink to change my braid trim from white to vintage photo. The coins are foreign coins from my stash.
 Close-up of my sentiment.
side view of my popped up holly berries and leaves.
The holly berry and leaves set is a set I won in one of Joan's challenges. Thank You Joan. This is a wonderful set that I can't wait to use in a more traditional way. 
This card was a blast to make!
Happy Scraps,
Mrs. Swandog

Friday, September 16, 2011

On A Roll With Halloween

Good Morning Ladies,
I am on a roll with Halloween. I am having fun using the halloween stamps I have purchased of late. I can't get enough of them.
Here is a witch card for you today...
This is the witch from the Tim Holtz Halloween clear set. I colorized her with Prisma pencil and Gamsol. She was stamped on bristol board cut with a Spellbinder die. The rest of the layers are cut from the DCWV Halloween stack. Rhinestones surround both die-cuts in purple and green. The cat is a flat back. Doesn't the witch always have a black cat.
My sister used to have a layer contest in her store. This is 5 layers sis! I know it is no match for what some of the ladies would do as far as layering goes.
Well...off to create...
Happy Scraps,
Mrs. Swandog

Thursday, September 15, 2011

Tim Holtz Skeleton

Good Morning Ladies,
I am off to a busy start today. I have two lessons and laundry all day. What a day off. LOL
My sister is having one heck of a big garage sale this saturday. If you are in the area of the fairgrounds stop by she is right across the street.
I can't get enough of my Tim Holtz Skeleton stamp. So here is another card using him....
For this card I used my guy and stamped him on bristol board cut with a spellbinder die. I gave the die a smokey look using a make-up sponge and Tim Holtz distressed ink in black soot. There are three layers of dsp underneath him. The top one is from authnitque from http://www.atjoansgardens.com/
This paper was a little to bright...no problem. I just took the black soot and sponged it lightly over the whole piece. The two papers below that are from Martha Stewart halloween pad. The bones paper was sponged with black soot also. I used black braid to give the card texture. The clock is from my old stock. I remember saving these. For what I do not know, but I felt it was perfect for this card. You have to love Halloween.
Well...off to get ready for my lesson...
Happy Scraps,
Mrs. Swandog

Tuesday, September 13, 2011

Wind Swept Cactus Horse

Good Morning Ladies,
I had a very busy day at work yesterday. Always on the first day back from time off of any  kind. So I slept well last night. I am very recharged this morning.
Here is a card for you today....
I used the same Inkadinkado horse set to make this card. This time I used the wind swept horse. I used the cactus, the clouds, and grass from Third Coast rubber stamps. Third Coast stamps are fun to work with in scene stamping. There is so much to choose from. Stamps you will use over and over again. This time I matted the scene with a border and corner punch set from Martha Stewart. The next layer is torn mulberry paper in dark brown. The bottom layer is a repeat of the punched paper. That paper is from a Bo Bunny pad I purchased from http://www.atjoansgardens.com/
If you have not tried scenic stamping you should give it a whirl. The best magazine to find a lot of this type of stamping is rubberstamp madness.
Happy Scraps,
Mrs. Swandog

Monday, September 12, 2011

Whimsy pet gang Thinking of You

Good Morning Ladies,
My vacation is over and I have to return to work today. We had a nice relaxing vacation at home.
I am running a little slow this morning.
So here is my card for today....
This is a simple card, but I really like it. The image is by Whismy Stamps. They have the cutest darn stamps. I stamped the image with archival ink on bristol board. It is colorized with Prisma pencil and Gamsol. The paper is from the Far East collection from DCWV. The die-cuts were created using a spellbinders die set. Gotta love those too.
Happy Scraps,
Mrs. Swandog

Sunday, September 11, 2011

Horse With Cheery Lynn Corner Die

Good Morning Ladies,
It was kind of a long night with Windy up panting and wanting out about every hour. I'm pretty tired this morning. Silly girl should not get in and eat things. Ah well we are up for the day.
I am so happy I purchased the Cheery Lynn Corner Die from http://www.atjoansgardens.com/search/label/Doily%20Dies
It is awesome....and here it is on a card...
This is a square 5 1/2 inch by 5 1/2 card. I cut three scallop die-cuts with a spellbinder die. The center one is cut from bristol board. I then stamped the horse in black archival ink from Ranger. I colorized the horse with Prisma pencil and Gamsol. I die cut the flourish corner die from Kaiser paper. This die cut like a breeze with all the intricate detail. I just love it! It took an ordinary card and turned it into awesome. Who would think one little die could do that.
I had a very happy surprise when the mail came yesterday. I bought 12 back issues of Rubber Stamp Madness off of e-bay. This is my first e-bay purchase in a long time. The issues date back to 1999. One of the issues is still the large format. I have only had a chance to take a quick glimpse of each issue. This was a wonderful purchase and I can't wait to dig into them.
Happy Scraps,
Mrs. Swandog

Saturday, September 10, 2011

La Blanche Secret Garden

Good Morning Ladies,
I spent some time creating yesterday. I pretty much had the whole day to play. I still have 3 cards sitting on the table that still need to be finished. I will get to those yet this weekend.
Here is one from yesterday....
This is another La Blanche stamp I purchased at Joan's Gardens. http://www.atjoansgardens.com/search/label/La%20Blanche
I used the La Blanche paper. I colorized using the cut-n-dry pen nibs for the scene and make-up sponges for the background. I used the Tim Holtz distressed inks. For my background paper I used plain brown cardstock and Graphics 45 paper. On the left side of the card I used a trim that I inked with the distressed ink. These stamps are fun to work with. I love all the detail they give.
Windy and I are off to a dog show today. We intend on having a lot of fun.
Happy Scraps,
Mrs. Swandog

Friday, September 9, 2011

Rearing Horse On The Mesa

Good Morning Ladies,
I'm getting back into the swing of things. I have been on vacation this week and have accomplished a lot of relaxing. We all need to do that sometimes I think.
I have been working on some cards but have been taking my time doing it.
Here is a sample for today....
I call this card Rearing Horse On The Mesa . To create this card I started with a square of bristol board. The horse was stamped and masked. The grass was stamped next. The mesa was stamped next and then masked. The next step was to stamp the rocks. The last stamping step was to stamp the clouds. The masks were removed and then the scene was colorized using Prisma pencil and Gamsol. This scene was then layered on two mats. A black cardstock mat was first and then a textured sand mat next. This was mounted on a 5 1/2 by 5 1/2 card. I added two vintage earrings I married together. The wire was tucked in between the mat layers.
I love to scene stamp and never seem to have time to do enough of it. I purchased a set of inkadinkado horse stamps and just had to stamp some scenes. The rocks and grass images are by Sunday International. The mesa and clouds are by Third Coast Rubberstamps.
Well....off to create...
Happy Scraps,
Mrs. Swandog

Thursday, September 8, 2011

La Blanche Stamps

Good Afternoon Ladies,
I have fallen in love with the La Blanche stamps. The La Blanche paper is a must with these stamps. Here is another sample made with these stamps...
This is a very cool vintage Santa stamp. To create this card I used the La Blanche paper and black archival ink. To colorize Santa I used Tim Holtz distressed ink and cut-n-dry pen nibs. Once Santa was colorized I used distressed ink in several colors to create the background. The edges were torn, inked, and curled. This paper curls very nicely. I mounted this panel on a printed Christmas paper that I inked with more distressed ink. This was mounted on a panel of card stock from Kaiser. This was attached to a 5 x 7 card. This vintage look was created with minimal effort.
Check out http://www.atjoansgardens.com/ to purchase the supplies in this project. She has many other awesome products.
Off to dog training...
Happy Scraps,
Mrs. Swandog

Saturday, September 3, 2011

Happy Halloween Pop-Up Card

Good Afternoon Ladies,
Right now I am suppose to be cleaning....but I finished a card this morning that I just have to share with you. I purchased the sizzix pop-up die at http://www.atjoansgardens.com/
Without further ado here is my card.....
 This is the front of my card. The bat and skeleton are from a Tim Holtz Halloween clear set. The front dsp is from Authintque and the happy halloween is from a DCWV mat stack.
 This is the inside with the pop-up. The pop-up has a witch and a cauldron from a Martha Stewart clear set. The bats are from the same set. The fence is from a Cheery Lynn die. The cat is from a Tim Holtz clear set. The papers on the top and bottom are from DCWV.


 A side view of the pop-ups.
A close up of the pop-ups.
This die was fun to create with and you will see more pop-up cards in the future here on my blog.
Now back to cleaning...
Happy Scraps,
Mrs. Swandog

Friday, September 2, 2011

Heidi Blankenship Guest Designer Challenge At Joan's Garden

Good Morning Ladies,
I went over to Joan's shop yesterday with my mom and sister. Of course we came home with some wonderful things. My sister's grandson went with us and had a grand time sitting by the pond and looking at the fish. He is four. He was such a good kid. I'm sure he has lots to tell about the pond. I don't even think he knew he was at a stamp store. LOL
Here is my take on this challenge at http://www.atjoansgardens.com/2011/08/heidi-blankenship-guest-designer.html
Check it out.
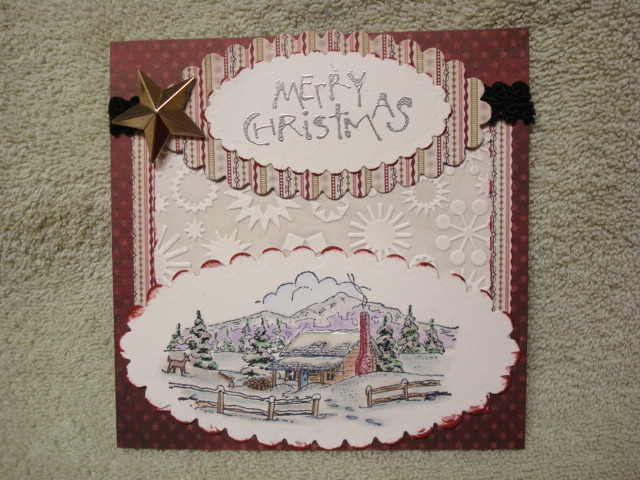
The challenge is to stamp on patterned paper to change the look to fit your project.


 For my card I used the new paper pad from Joan's. It is Bo Bunny of et cetera collection. This is a wonderful pad of antique looking paper. I stamped this patterned paper with a La Blance stamp. To stamp with I used archival ink in the colors of sepia and coffee. Also purchased at Joan's yesterday. Below you will see the paper before it was stamped with the La blance stamp. I used my spellbinders to cut out a solid piece of cardstock and a piece of the La Blance paper. The bird stamp is also a La Blance stamp from yesterday's purchases at Joans.  I stamped the bird and flowers with the coffee ink. I then colorized the image with Tim Holtz distressed ink and cut and dry pen nibs by Ranger. Make-up sponges were used with the distressed ink to colorize the background. A ribbon was applied at the bottom for a finishing touch.
Here is the paper before stamping...

This paper is cool on it's own...but with the stamping ...Wow!
Here is the paper side by side with the card. I kept this card simple to show off the technique.
Of course I picked up many other things at Joan's. You will see these used in the near future on my blog.
Thanks for the challenge Joan!
Off to create....
Happy Scraps,
Mrs. Swandog